What type of issue are you experiencing?


Clean your fixture once a week with a microfiber cloth and warm water.

Do not use paper towels or abrasive/harsh cleaners. This will damage the finishes.
When your sanitizer tank is empty, follow these steps:
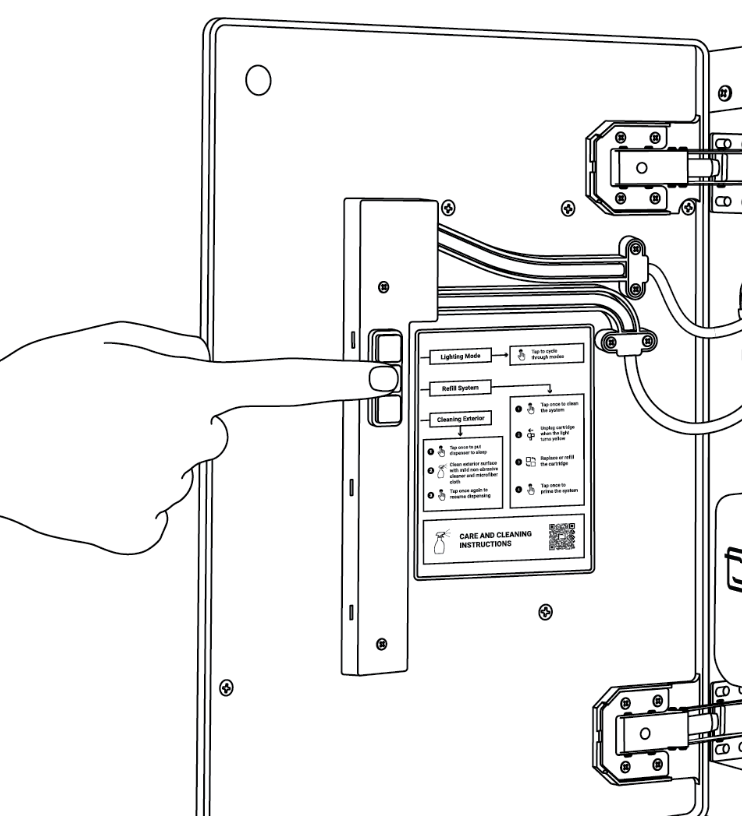
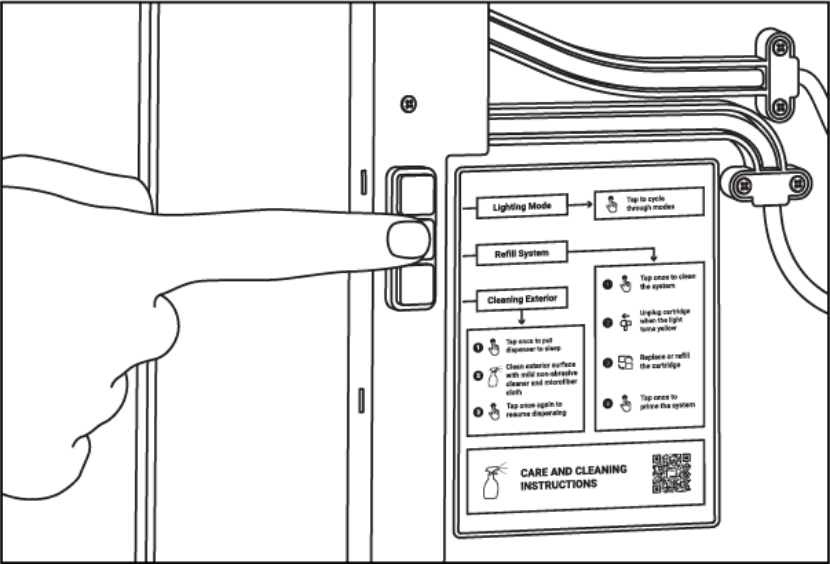
Step 1: With the empty tank still attached, press the middle button inside the door to clear the system of any remaining sanitizer. Wait for the front panel LED light to stop blinking red.
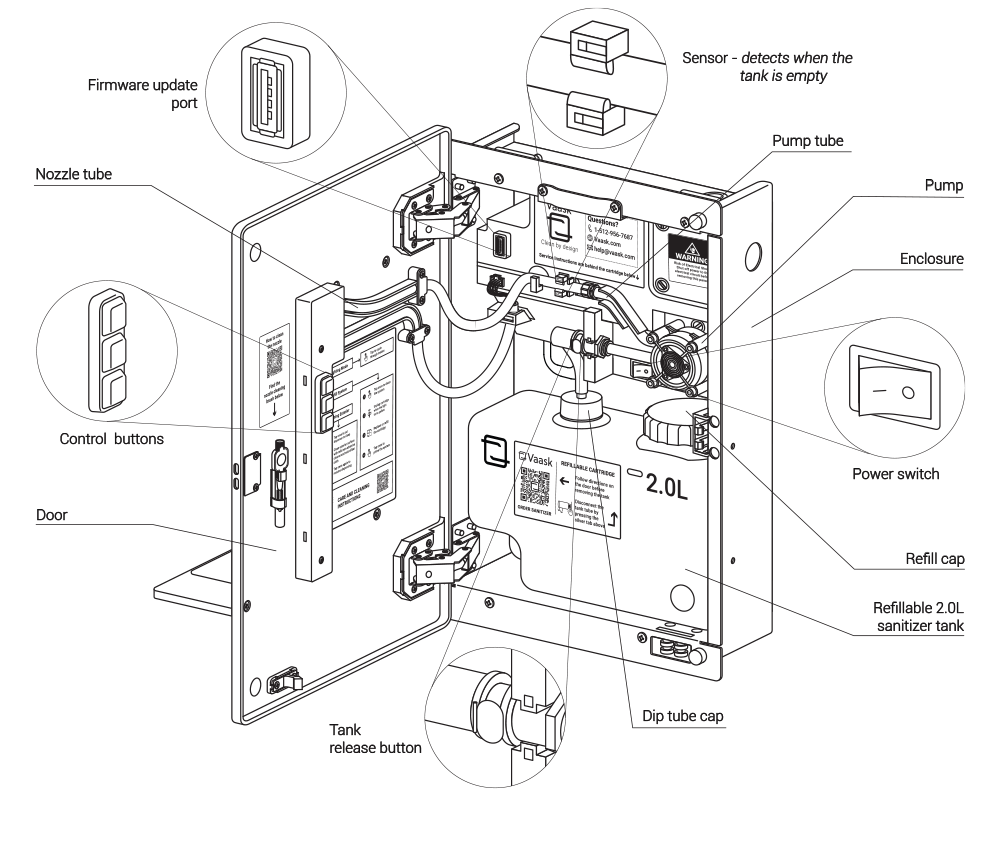
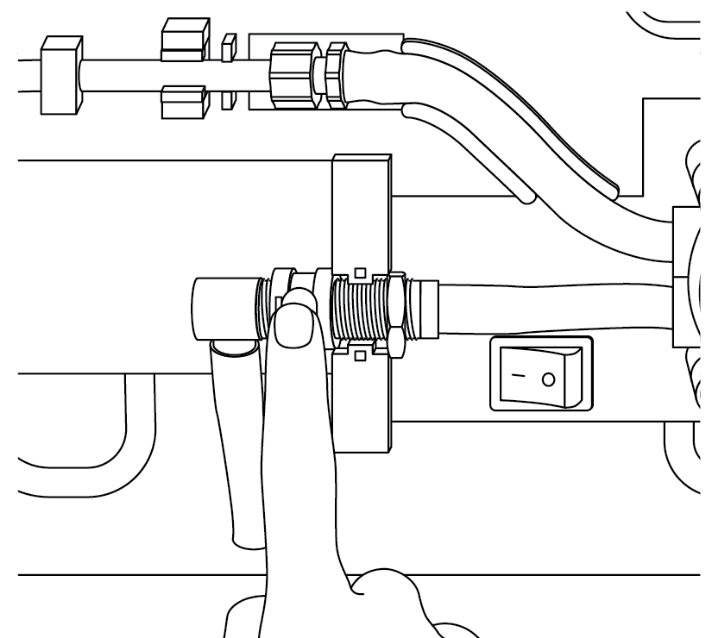
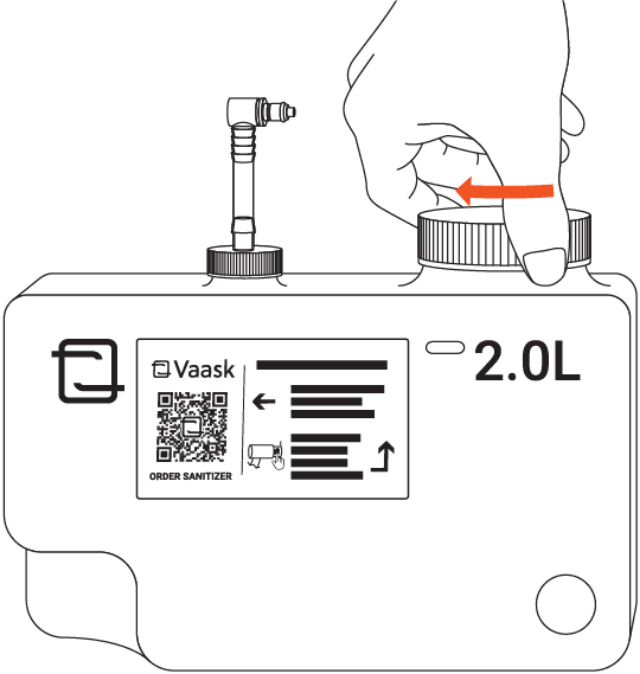
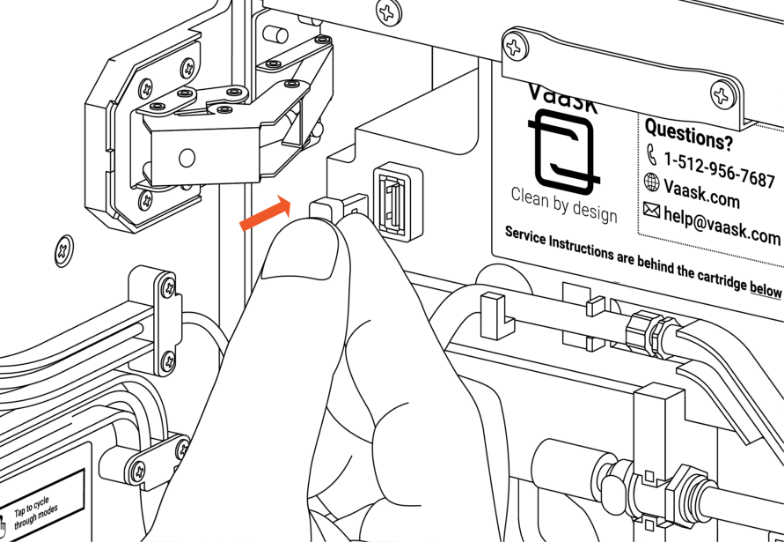
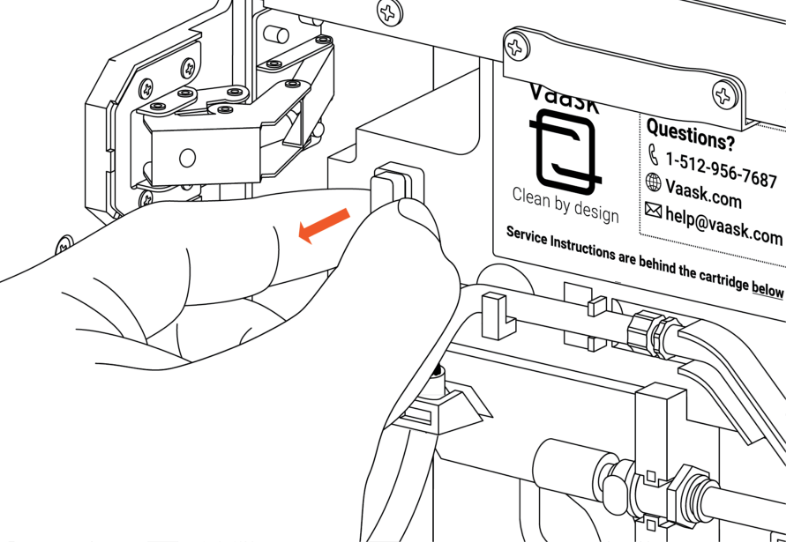
Step 2: When the light on the door turns yellow-green, unplug the tank by pressing the silver tab near the dip tube fitting and remove the tank.
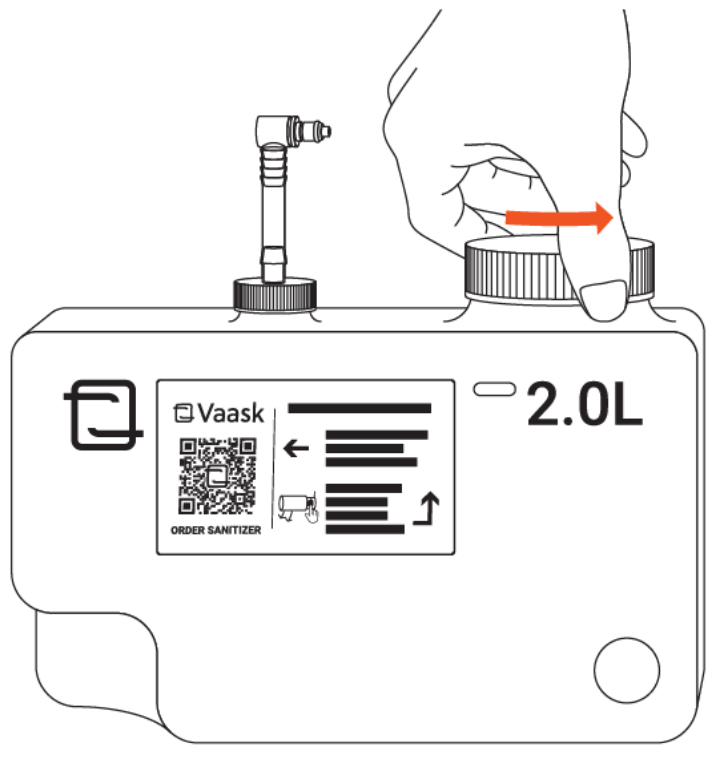
Step 3: Unscrew and remove the refill cap on top of the refillable tank.
NOTE: If your sanitizer gel is more than six months old, we recommend rinsing out the tank and drying before refilling.
Step 4: Fill the tank to the desired level with quality hand sanitizer gel made of 60% to 75% ethyl alcohol.
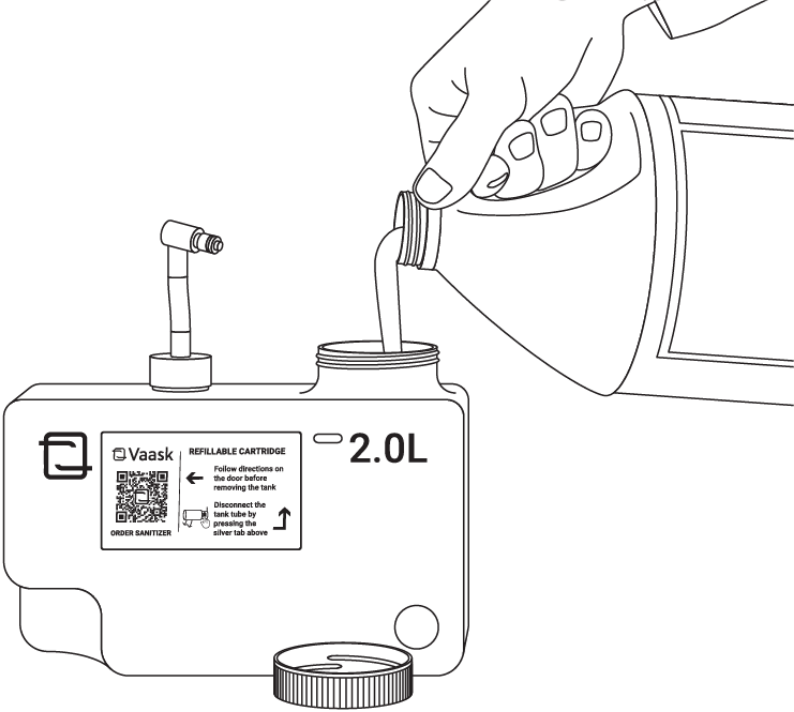
NOTE: Fire code requires that the tank not be filled to more than:
• 1.2 L in corridors and rooms open to corridors
• 2.0 L in rooms closed off by doors
Step 5: Put the refill cap back on the tank and hand-tighten.
Step 6: Connect the filled tank to the Vaask fixture by inserting the tube fitting into the connector. It will make a "click" sound when connected properly.
Step 7: Press the middle button inside the door to prime the fixture.
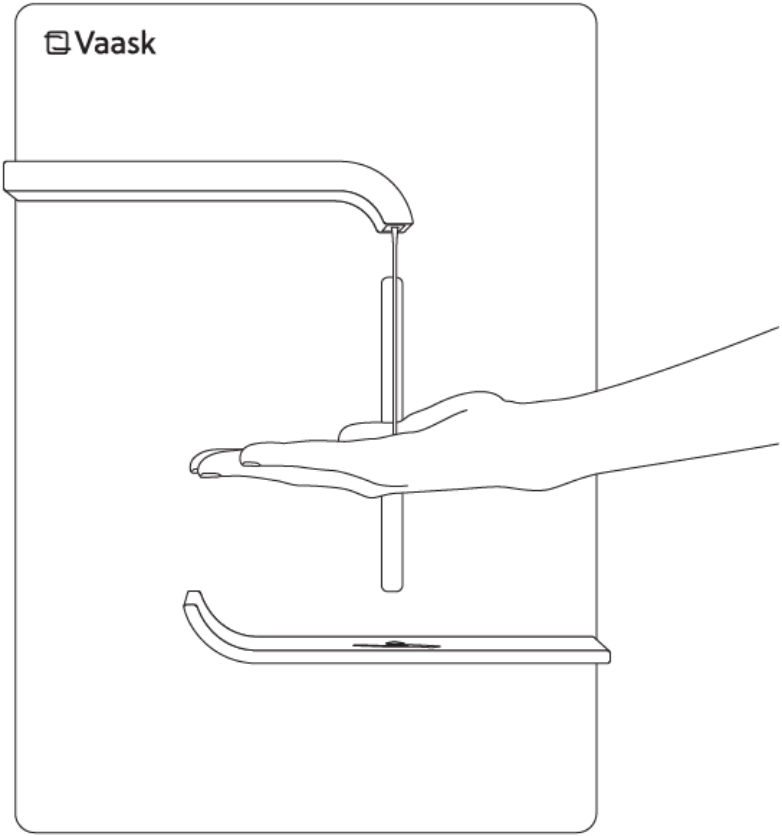
Step 8: Once the door light stops blinking, place your hand within 4 inches of the dispensing nozzle 3-4 times to activate the pump and confirm that the sanitizer is dispensing properly.

When a new firmware update is available for your Vaask fixture, you will be notified. Firmware is the software that helps the hardware do its job. For example, updates can make the sensor even more precise or allow fixtures to connect to Wi-Fi.
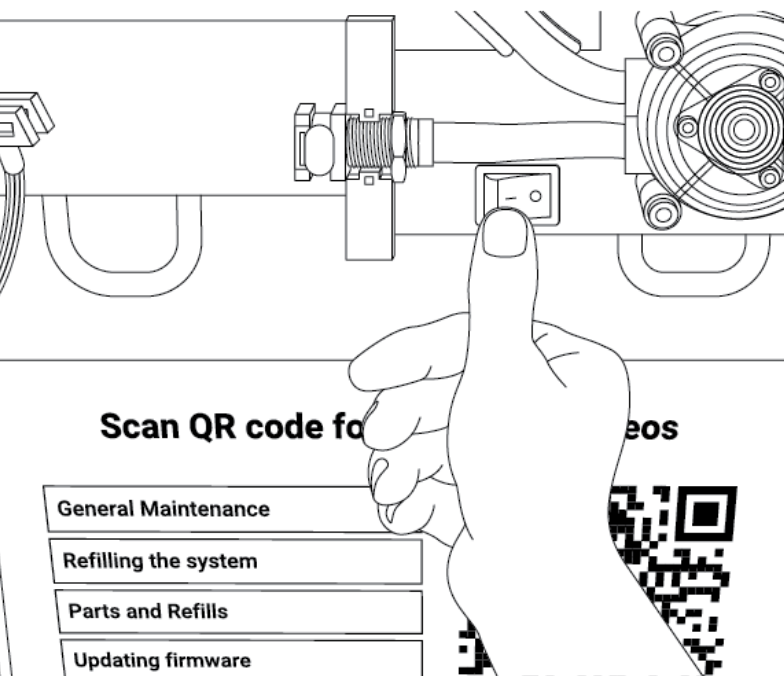
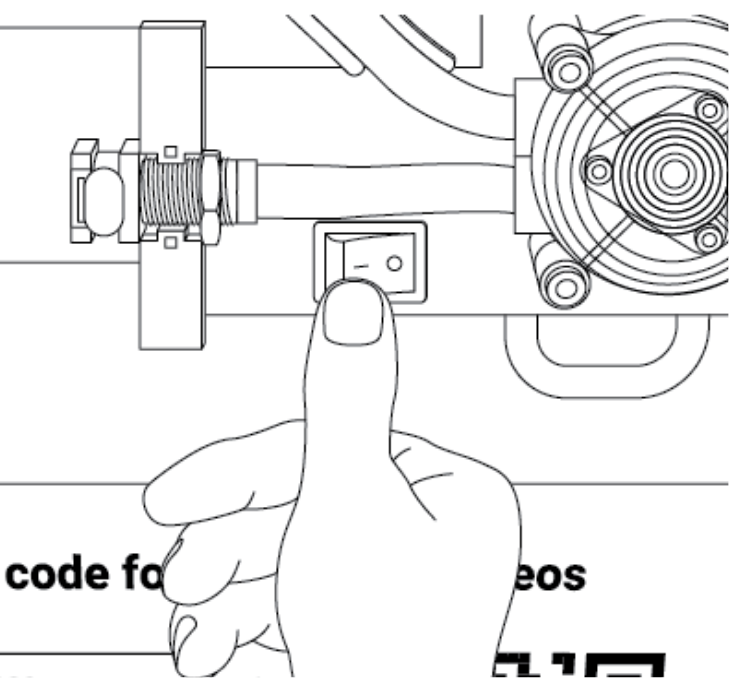
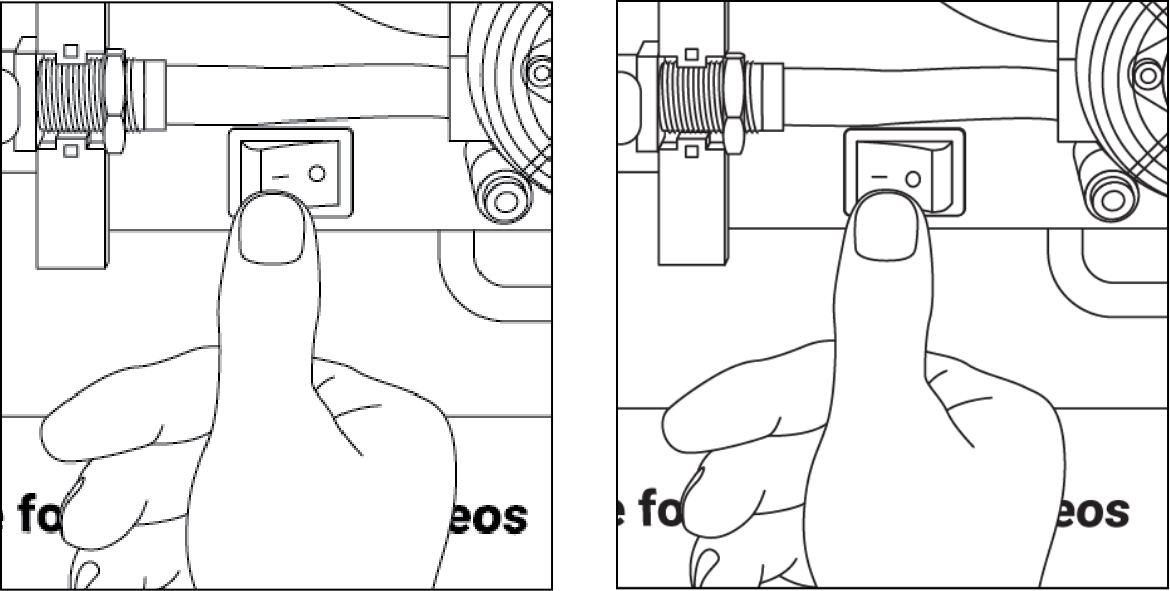
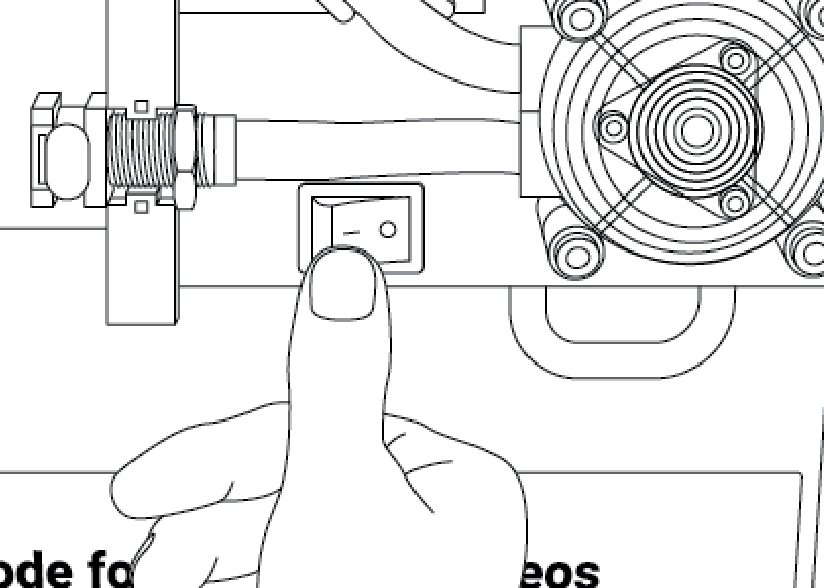
Step 1: Make sure the Vaask fixture’s power switch is on [-].
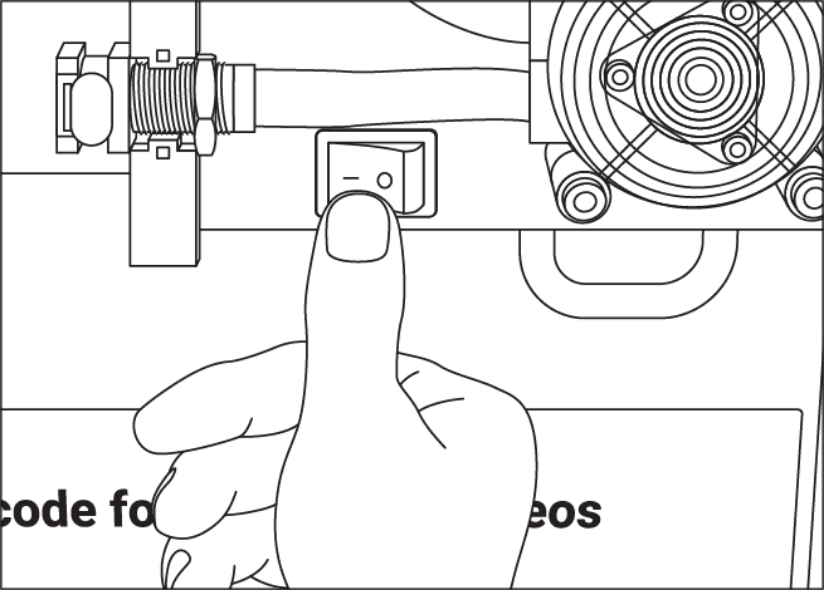
Step 2: Insert the USB flash drive into the USB port, located in the upper left corner of the enclosure.
Step 3: The front LED lights will begin blinking. The number of red and green blinks should correspond to the version of firmware being installed, as seen in the video above. For example, three red blinks followed by one green blink indicates version 3.1.
Wait for the front LED lights to stop blinking. The pump will prime by rotating for a few seconds.
If the number of blinks doesn’t match the firmware you are supposed to be installing, call customer service at +1 (512) 956-7687.
Step 4: Remove the USB flash drive and close the door.
Your fixture is now ready to use.
Step 1: Flip the power switch off [o].
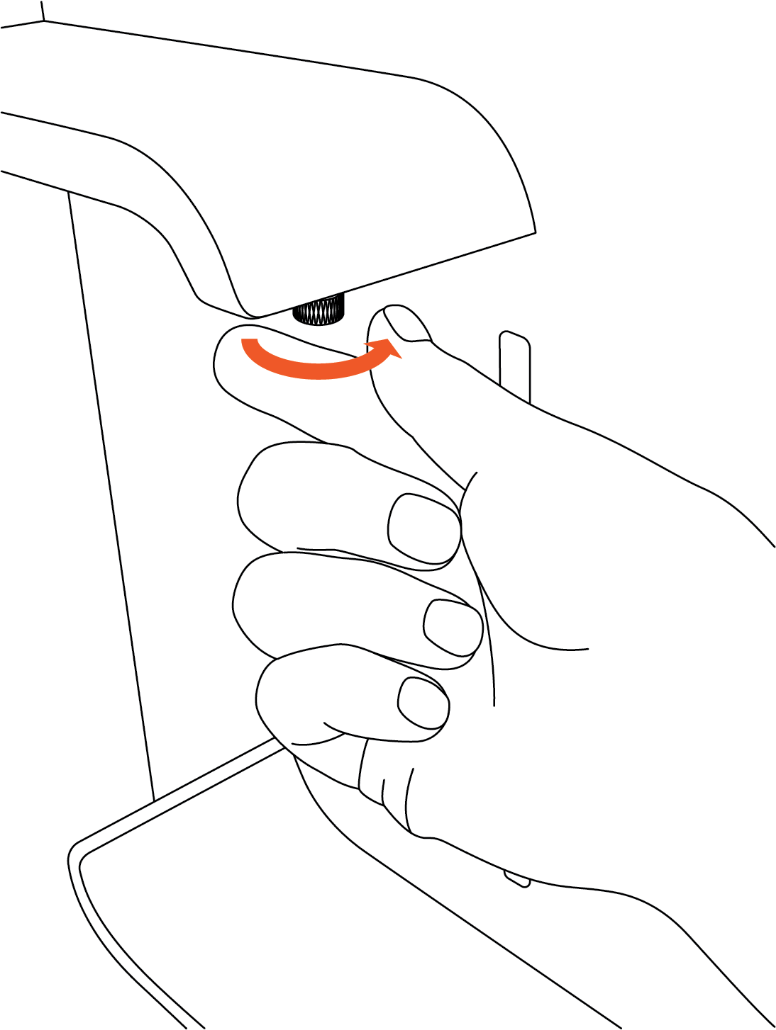
Step 2: Turning clockwise, unscrew and remove the nozzle.

Step 3: Holding the nozzle in one hand, insert the nozzle brush into the opening. Move the brush up and down to clear the opening of any dried gel. Inspect the nozzle to make sure the opening is clear.
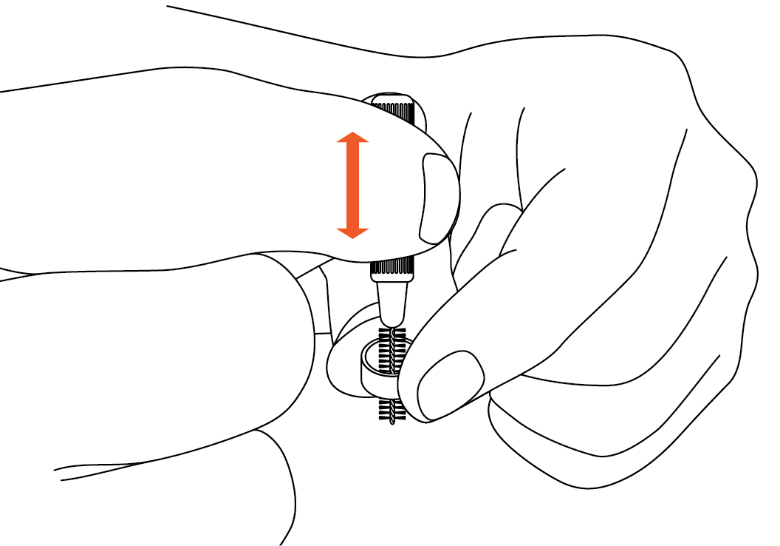
Step 4: Turning counterclockwise, hand-tighten the nozzle gently until it stops. Do not over-tighten.
Step 5: Flip the power switch on [-].

Step 6: Once the light on the front panel stops blinking, place your hand within 4 inches of the dispensing nozzle 3-4 times to activate the pump and confirm that the sanitizer is dispensing properly.

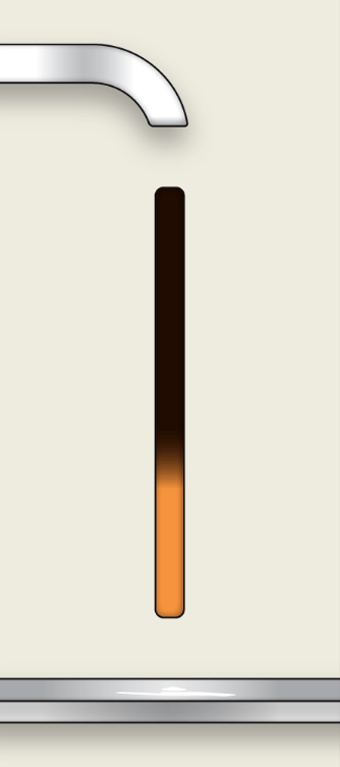
LED Light blinks orange after attempting to dispense |
||
 |
Possible Causes |
Solutions |
Dispensing is paused |
Press bottom button inside door to resume dispensing. 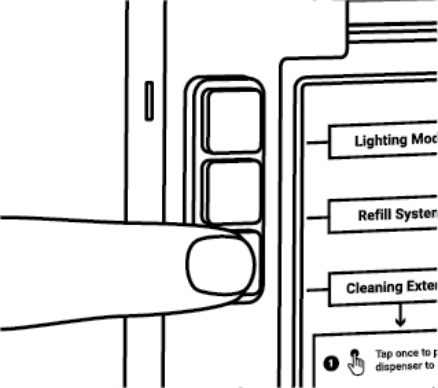 |
|
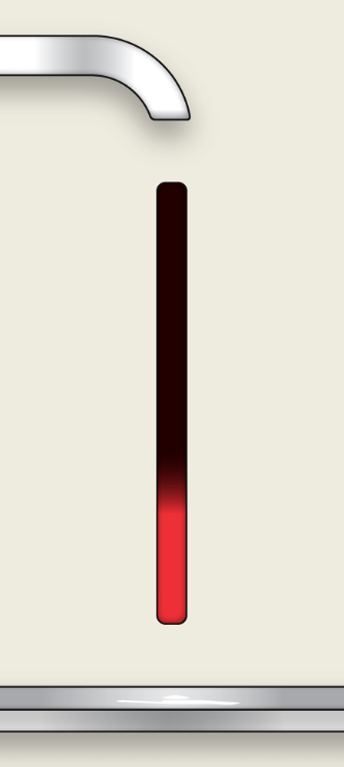
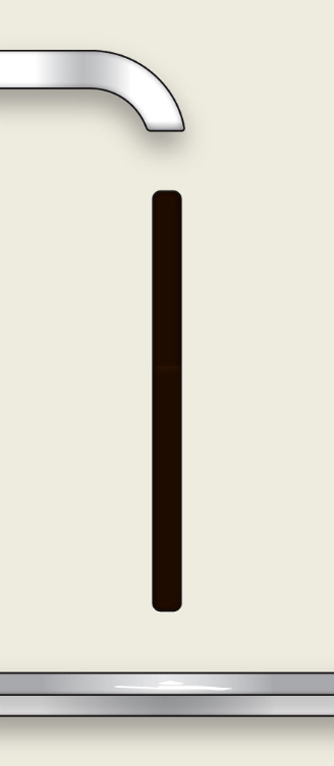
Bottom of LED light is red |
||
 |
Possible Causes |
Solutions |
Sanitizer tank is empty |
||
Sensor is incorrectly registering as empty |
Flip the power switch off [o] and on [-] again to allow fixture to reset 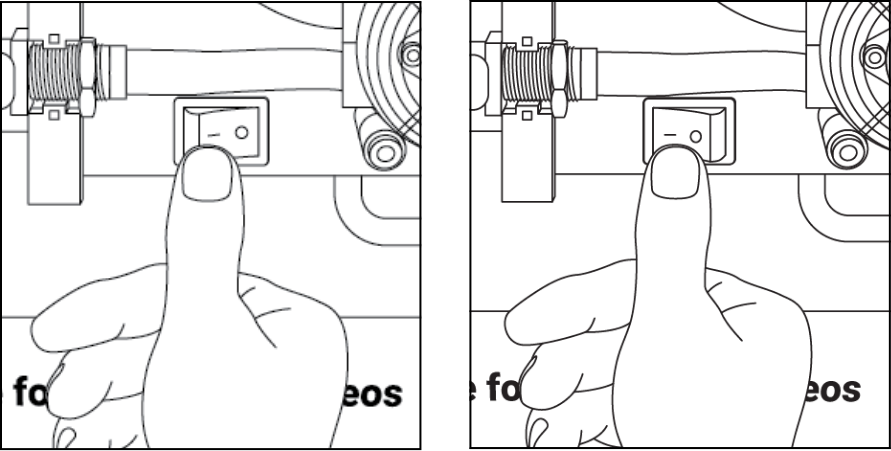 |
|
Tube is not secured in sensor |
Reinsert the tube into the sensor and the flip power switch off and on to reset the system |
|
LED light is Orange and at 30% |
||
 |
Possible Causes |
Solutions |
Sanitizer level is low |
Within a week, sanitizer will need to be refilled; follow the instructions to refill the tank |
|
You might have missed a step while refilling tank |
||
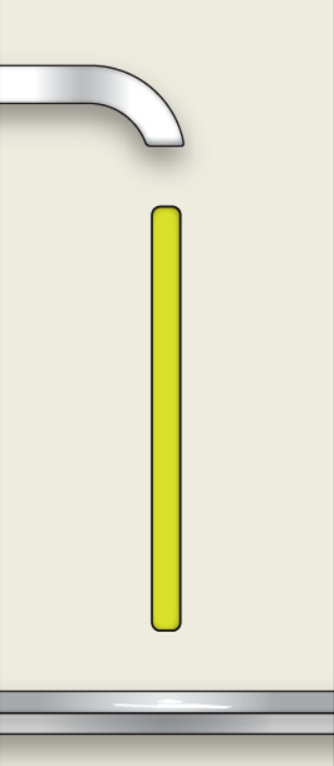
LED light is Yellow-green |
||
 |
Possible Causes |
Solutions |
Vaask is in refill mode |
After pressing middle button, light blinks red and then turns yellow-green, which means it’s safe to remove and refill the sanitizer tank; proceed through the steps of refilling the tank |
|
LED light is not on |
||
 |
Possible Causes |
Solutions |
Unit is off |
Flip power switch on [-] 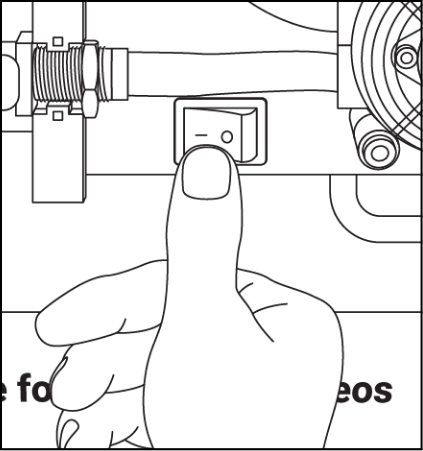 |
|
LED light is in off mode |
Tap top button on inside of door to cycle through the lighting mode options 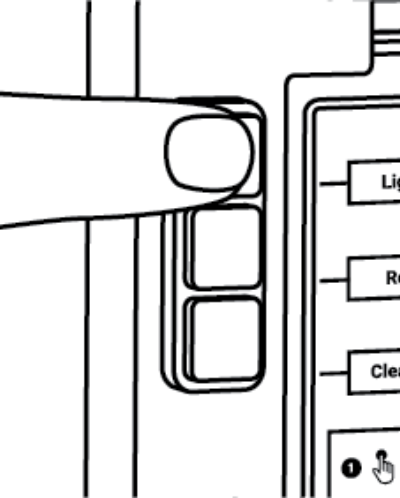 |
|
The default dispensing dosage is set to allow an average-sized person to fully cover their hands with sanitizer for the recommended 20 seconds. You can adjust the dosage using the following steps:
Step 1: Flip the power switch off [o].
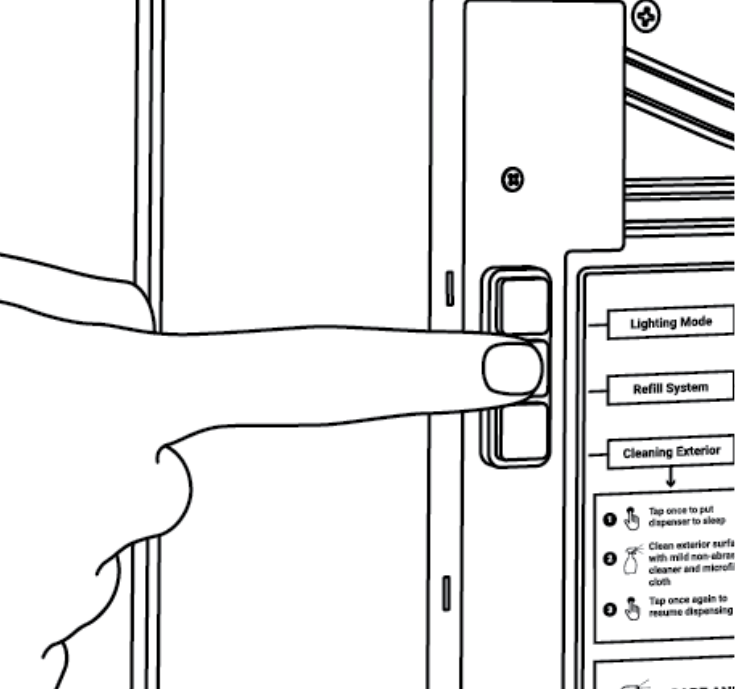
Step 2: While holding the bottom button on the inside of the door (A), flip the power switch on (B). Release the bottom button when the front LED light turns blue.
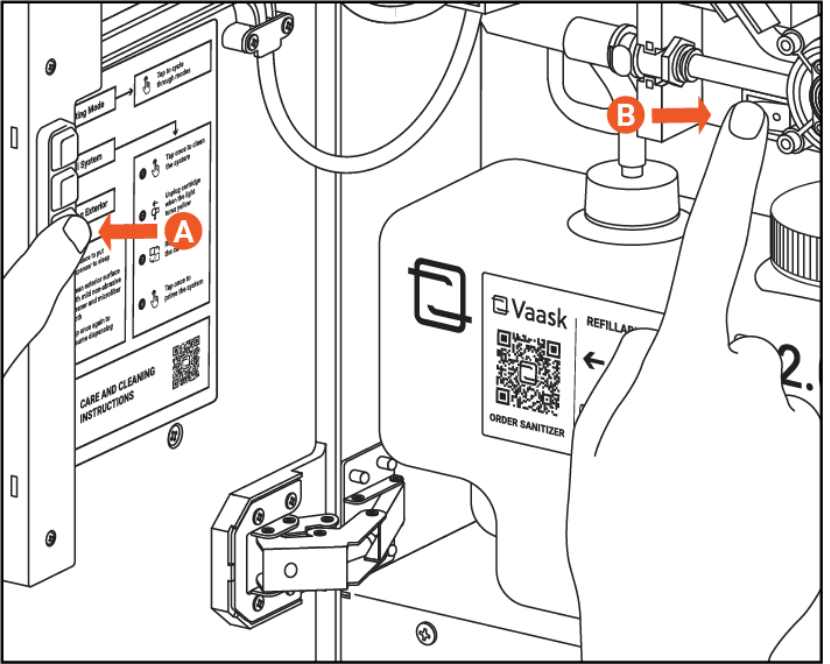
Step 3: To increase the dispensing amount, press the top button (A) on the inside door. To decrease the dispensing amount, press the middle button (B).

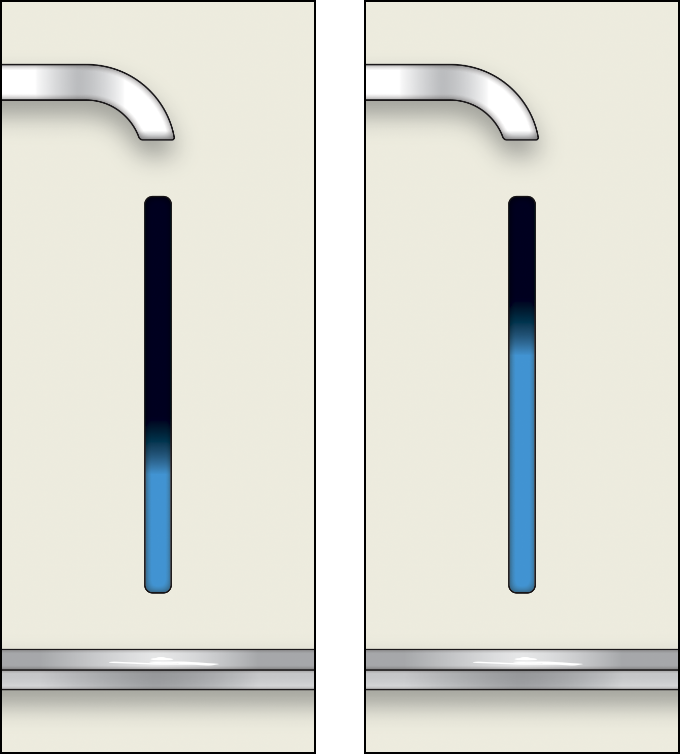
The front panel LED light will show the relative dispensing amount.
Step 4: Flip the power switch off [o] and on [-] again to accept the setting.
Step 5: Place your hand within 4 inches of the dispensing nozzle 3-4 times to activate the pump and confirm that the sanitizer is dispensing properly.

Step 6: Repeat until the desired dosage is reached.
Step 1: Reinsert the tube into the sensor.
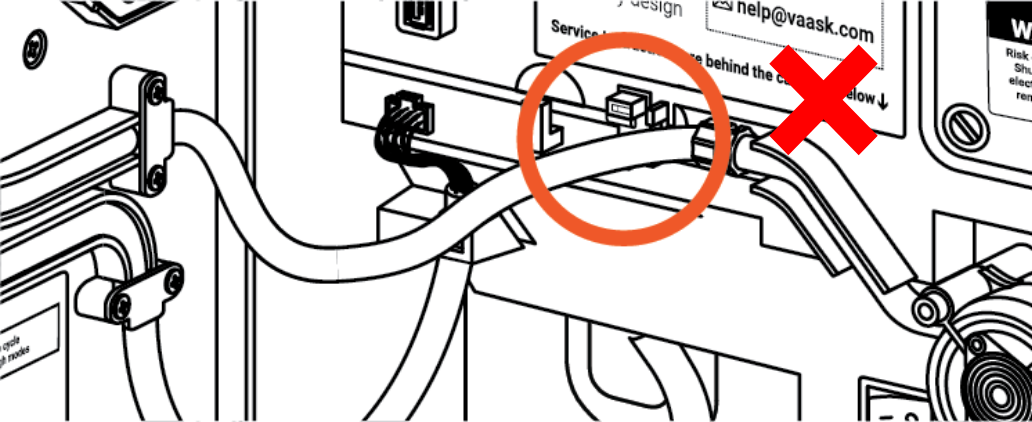
Incorrect position
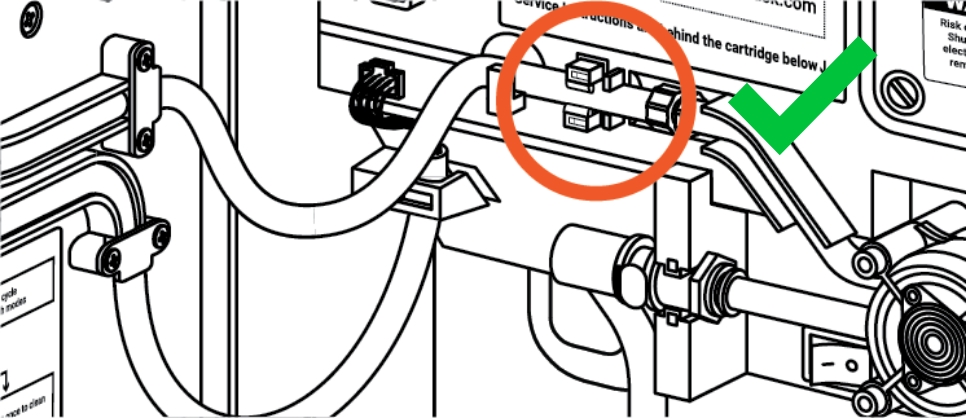
Correct position
Step 2: Flip the power switch off [o] and on [-] to reset the system.

Possible Causes |
Solutions |
Sanitizer tank is empty |
|
Unit is paused and LED light is flashing orange when you insert your hand under the nozzle |
Tap bottom button on inside of door once 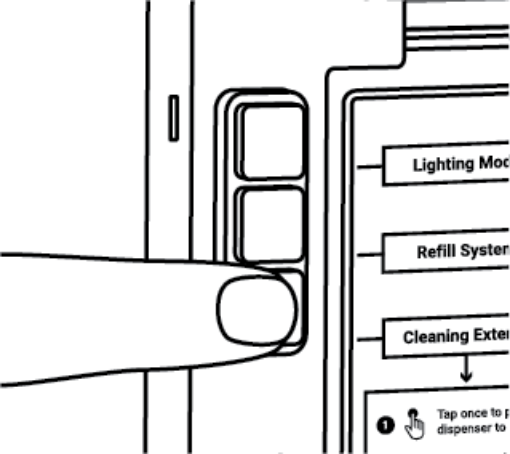 |
Pump tube is stuck |
Pull the two tubes (top and bottom) attached to the pump to dislodge 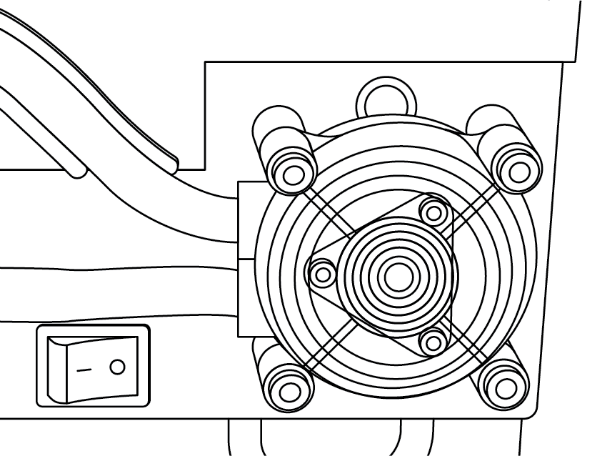 |
Dip tube is disconnected |
Hand-tighten the dip tube into smaller cap of sanitizer tank 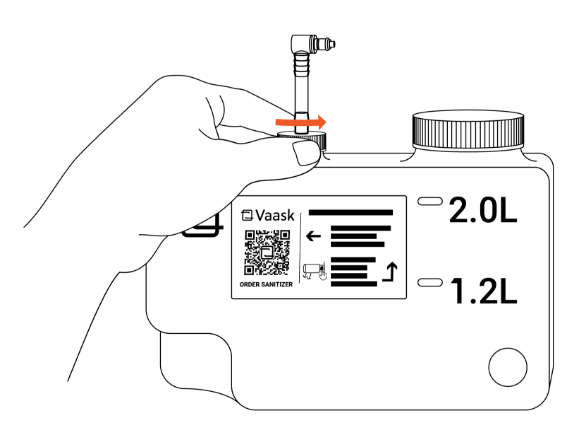 |
Nozzle is clogged |
|
Tank is disconnected |
Insert the tube fitting from the sanitizer tank into the connector |
Step 1: Connect the filled tank to the Vaask fixture by inserting the tube fitting into the connector. It will make a "click" sound when connected properly.
Step 2: Press the middle button twice to prime the fixture.
Step 3: Once the door light stops blinking, place your hand within 4 inches of the dispensing nozzle 3-4 times to activate the pump and confirm that the sanitizer is dispensing properly.
Possible Causes |
Solutions |
Nozzle is clogged |